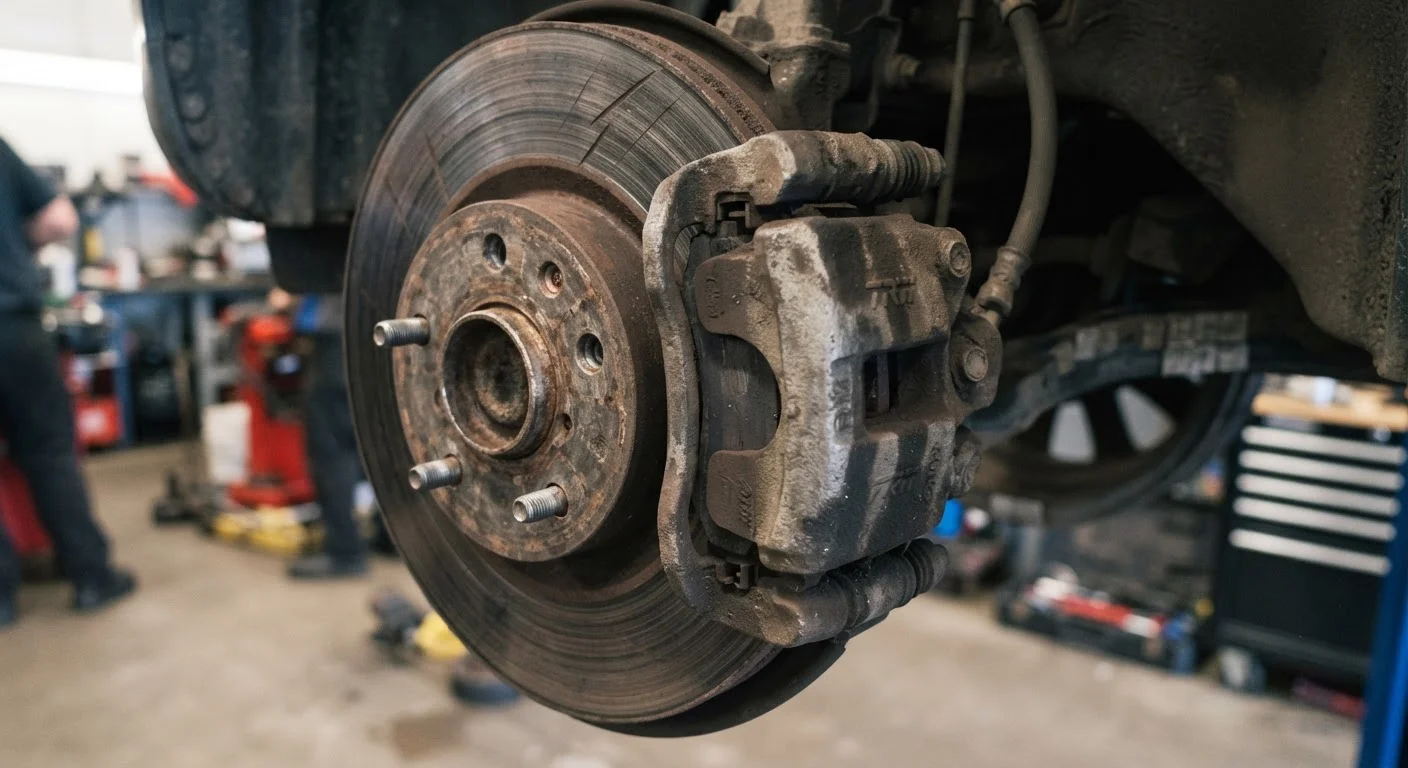
Why Brake Wear Matters — and How It Progresses
Brake pads and rotors are consumable components. Every time you press the brake pedal, friction material on the pads presses against the rotor surface to slow the vehicle — and a small amount of that material is worn away in the process. Under normal driving conditions, front brake pads typically last between 30,000 and 70,000 miles, while rear pads often last longer due to the front brakes carrying more braking load. Rotors generally outlast one or two sets of pads, but they too have a minimum thickness specification below which they must be replaced.
The problem is that wear rarely announces itself dramatically at first. It progresses through recognisable stages — from early audible warnings to performance changes to outright danger — and catching it in the early stages keeps repair costs manageable and keeps you safe. Understanding the warning signs of brake wear is one of the most practical skills any driver can develop.
How to Inspect Your Brakes: A Step-by-Step Approach
You don't need to be a mechanic to perform a meaningful preliminary brake check. The steps below walk you through what to look and listen for — both from inside the car and during a safe visual inspection. If any step reveals a concern, schedule a professional inspection promptly.
Listen for warning sounds during a normal drive
Before touching anything, pay attention to what your brakes communicate through sound. During a quiet stretch of road, apply moderate, steady brake pressure and listen carefully. A high-pitched squeal that appears only when braking — and disappears when you release the pedal — is the classic wear indicator signal. A grinding or scraping sound that persists regardless of brake pressure suggests more advanced wear.
Feel for pedal behaviour and vehicle response
In a safe, low-speed environment such as an empty parking lot, apply the brakes at a range of pressures. Notice whether the pedal feels firm and consistent or if it pulses, vibrates, or sinks further than usual before the car slows. A pedal that pulses rhythmically often corresponds to rotor issues. Also note whether the vehicle pulls to the left or right during braking — this asymmetric response warrants investigation.
Perform a visual inspection through the wheel spokes
With the vehicle parked on a flat surface and the engine off, crouch down beside each front wheel and look through the wheel spokes. You should be able to see the brake pad sandwiched between the caliper and the rotor. Most pads have at least 3mm (roughly 1/8 inch) of friction material remaining when new; if what you see looks thinner than a pencil's width, the pad is approaching its service limit. Also look at the rotor surface — it should appear relatively smooth. Deep grooves, heavy rust channels, or a lip around the outer edge are signs the rotor needs professional assessment.
Check the brake warning light and owner's manual
Some vehicles are equipped with electronic pad wear sensors that trigger a dashboard warning light when pads reach minimum thickness. Check your instrument cluster for a brake-specific warning indicator — typically a circle with an exclamation mark or the letter 'B'. Consult your owner's manual to confirm what the light means for your specific vehicle, as some brake lights indicate pad wear while others signal hydraulic pressure issues. Your manual will also list the manufacturer's recommended brake inspection interval.
Decide on next steps based on what you found
If your inspection revealed only minor wear — pads still above 3mm, no unusual sounds, no pedal issues — schedule a professional brake inspection at your next service visit. If you noticed squealing, thin pads, rotor surface damage, or any pulling or pulsing, book a dedicated brake inspection without delay. If you heard grinding or experienced a noticeably soft or unresponsive pedal, treat this as a priority: consult when to stop driving immediately vs. drive to a garage to help you judge urgency before getting behind the wheel again.
Grinding Brakes Require Immediate Attention
If you hear a consistent grinding or metal-scraping sound when braking, do not continue driving longer than necessary to reach a qualified mechanic. This sound typically means brake pad material has been fully consumed, and metal components are contacting the rotor directly. Continued driving in this condition can damage rotors beyond resurfacing and, more critically, compromise your ability to stop safely.
What the Symptoms Are Telling You
Different brake symptoms point to different underlying conditions. Knowing what each signal means helps you communicate clearly with a mechanic and prioritise urgency appropriately.
- High-pitched squealing: Most brake pads include a small metal wear indicator — a thin tab that contacts the rotor when the pad wears down to its minimum safe thickness, producing a deliberate squeal. This is your earliest audible warning. See also what your brakes are telling you for a deeper breakdown of these signals.
- Grinding or metal-on-metal scraping: This means the friction material is gone. Rotors are now being damaged with every stop. Continued driving risks scoring the rotor so severely it cannot be resurfaced — only replaced.
- Pedal pulsing or vibration: A brake pedal that pulses under moderate pressure often indicates rotor runout or warping — where the rotor surface is no longer perfectly flat. Heat cycling and hard stops can cause this over time.
- Pulling to one side under braking: This can indicate uneven pad wear between the left and right sides, a sticking caliper, or a hydraulic imbalance. Uneven brake pad wear has specific causes worth understanding, as the fix depends on identifying the root problem.
- Longer stopping distances or a soft pedal: These are serious symptoms that may involve more than just pad or rotor wear. A soft or spongy pedal can indicate air in the brake lines or a hydraulic issue. Consult what your brake warning light means if a dashboard light appears alongside these symptoms.
If you notice unusual sounds while driving beyond braking situations, this guide to strange driving noises can help you isolate whether it's brake-related or something else entirely.
This article provides general educational information about brake wear indicators. It is not a substitute for a professional inspection by a qualified mechanic. If you are uncertain about the condition of your brakes, have them assessed by a licensed automotive technician before driving further.